DIY Solar Generator
- by cdelatorrejr
- Posted on June 30, 2022
For years, I have found off-grid power sources useful and necessary. It has helped me to utilize various electric devices for yard maintenance and as alternate means of power during power outages. Currently, I have two gas powered inverter generators which I have used for camping and have around for emergency situations during storm season in Florida where with extended power outages. Now with the gas prices soaring and carbon emission problems, these gas powered inverters will be my last resort for off-grid power.
For quite some time, I’ve been researching solar powered generators. With climate change and need to reduce carbon emissions, it’s become more imperative to look for “greener” power solutions.
There are numerous vendors which provide turn-key solar generators for various wattages (500W, 1000W, 3000W, etc.). From my research, these are good solutions fulfilling your every power needs but with inherent limitations. Some of the drawbacks are they are expensive solutions, not able to replace batteries as batteries go bad and limitations on expandability (upsizing inverter and increasing solar array).
The major components of a solar generator are the solar charger controller, the battery, inverter and solar panels.
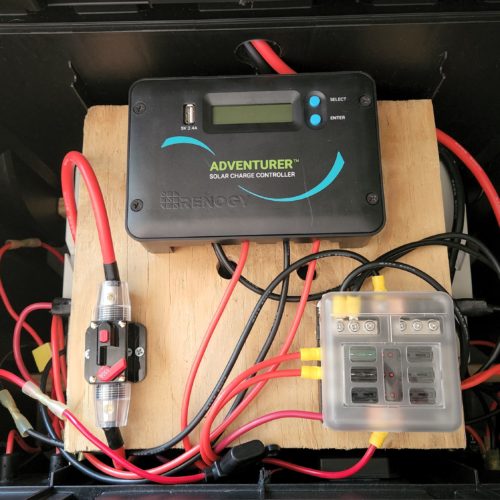
The solar charger controller is able to take the energy provided by the solar panels to charge the battery. There are two different types: PWM or MPPT. MPPT is the new type of controller which is able to charge your battery bank quicker. PWM is more cost effective but a slower battery charger. For my solution I chose a 30A PWM solar charge controller as a nice balance and capable of expansion. A typical 100W solar panel will provide around 5A of charge.
The battery provides the capacity measured in terms of Watt hours. The larger the Watt hour, the longer you can provide power. There are two types of 12V batteries – Lead Acid and Lithium Ion (LiFePO4). Lead Acid batteries are your common 12V car batteries. The drawback of these types of batteries is they do not hold their charge for extended periods of time and cannot be discharged below 80% without causing long term damage preventing future charges to capacity. The lead acid batteries are also very heavy compared to the lithium ion batteries. The pros to lead acid batteries are they are cheaper compared to the Lithium Ion batteries. Lead acid batteries allow for 600-800 cycles of charging compared to 3000 cycles with the Lithium Ion batteries. For my DIY solar generator, I chose the Lithium Ion 12V 100Ah battery which gives 1200 Watt hour of capacity.
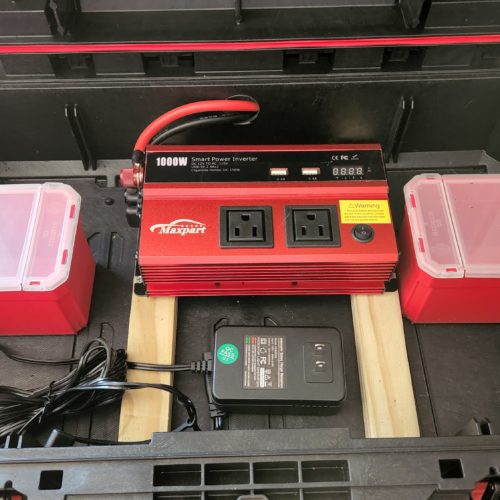
The next component of a solar generator is the inverter. Inverters convert DC to AC power. Inverters range in wattage from 500W to 3000W. For my needs, I chose a 1000W inverter to be able to provide power to fans, computers & laptop charging & small appliances.
The last component of a solar generator is the solar panels. To charge my 1000Wh battery within a single day, I chose 4x 100W solar panels providing 400W total charging power. This should adequately charge my battery within 9.6 hours of sunlight. There are folding solar panels which are truly portable and packable but your are paying extra for these features. I will build folding stands for each solar panel out of PVC. The solar panels I will store until necessary – camping trips or to charge solar generator during outage.
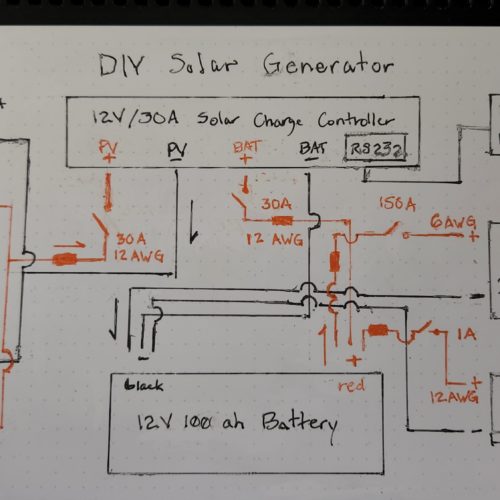
Lastly, I drew up the electrical schematics of my DIY solar generator and adhered to certain standards – wire gauge size based on amperage and followed safety guidelines for DC circuits to wire the fuse before an on/off switch. So when the fuse trips, it will protect any devices behind it.
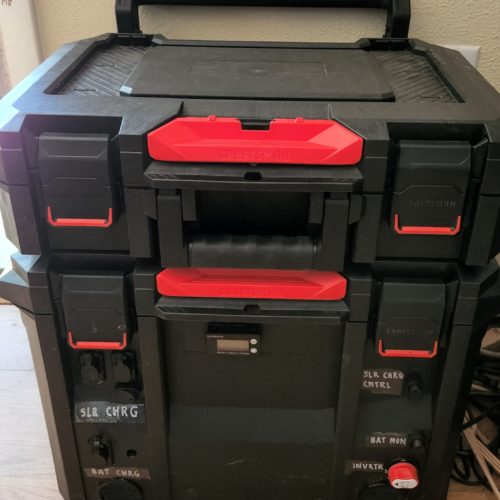
I chose a Craftsman Tradestack 22.5 inch system as the container for my DIY solar panel. The Craftsman Tradestack system is rugged, durable, has wheels and expandable. The battery, solar charger controller and all circuitry fit with ability for further expansion in the lower tool box. I bought the add-on Craftsman Tradestack briefcase to sit on top for the inverter, spare fuses, AC battery charger and power strip.
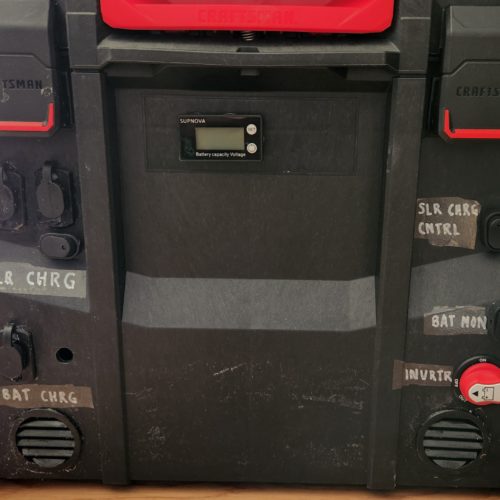
Finally, some of the add-ons to my DIY solar generator are a 12V battery monitor which I mounted to the container, rocker switches for all circuits (solar panel, AC battery charger, solar charger controller & battery monitor), Bluetooth modules for solar charger controller and battery monitor which allows me to monitor solar charging, battery voltage and load for my system without having to open the case.
Below is a gallery of photos from the planning to the completion of my DIY Solar Generator.
I cannot take complete credit for my research. I’ve found various articles related to DIY solar generators. I found this link very helpful & informative and became the baseline for my build – How to Build A DIY Solar Generator (A Complete Guide). I recommend having a basic understanding of DC circuits as fundamental prior to embarking on this or similar projects. As always, stay safe!
For years, I have found off-grid power sources useful and necessary. It has helped me to utilize various electric devices for yard maintenance and as alternate means of power during power outages. Currently, I have two gas powered inverter generators which I have used for camping and have around for emergency situations during storm season…

